There’s a particular pleasure in watching a well-struck ball roll clean and true across a perfectly level lawn, the kind of surface where strategy takes center stage and the court itself never becomes the obstacle. That’s the promise of a genuine croquet court, and it’s a promise that takes real planning to keep.
Croquet is experiencing a genuine resurgence, drawing players of all ages who are drawn to its blend of strategy, social play, and outdoor enjoyment. Communities across Western North Carolina and beyond are investing in dedicated facilities, and for good reason. A properly built croquet court is a long-term asset that rewards the investment for decades.
This guide covers everything you need to know about professional croquet court construction, from the first site walk-through to the day you set the pegs and open play. When considering croquet court layout requirements, it’s important to account for factors such as adequate space, surface quality, and orientation of the courts. Proper planning will ensure that players have the best experience and that you comply with any official guidelines. Additionally, incorporating details like boundary markings and seating arrangements can elevate your court to meet professional standards. Understanding the tournamentstandard croquet facilities overview is crucial for ensuring that your courts meet the highest standards required for competitive play. You’ll want to pay close attention to the layout, surface materials, and drainage systems that can impact gameplay and player enjoyment. Proper planning and execution in these areas will create an inviting environment for both participants and spectators alike.
Why a Professional Croquet Court Is Worth Building Right 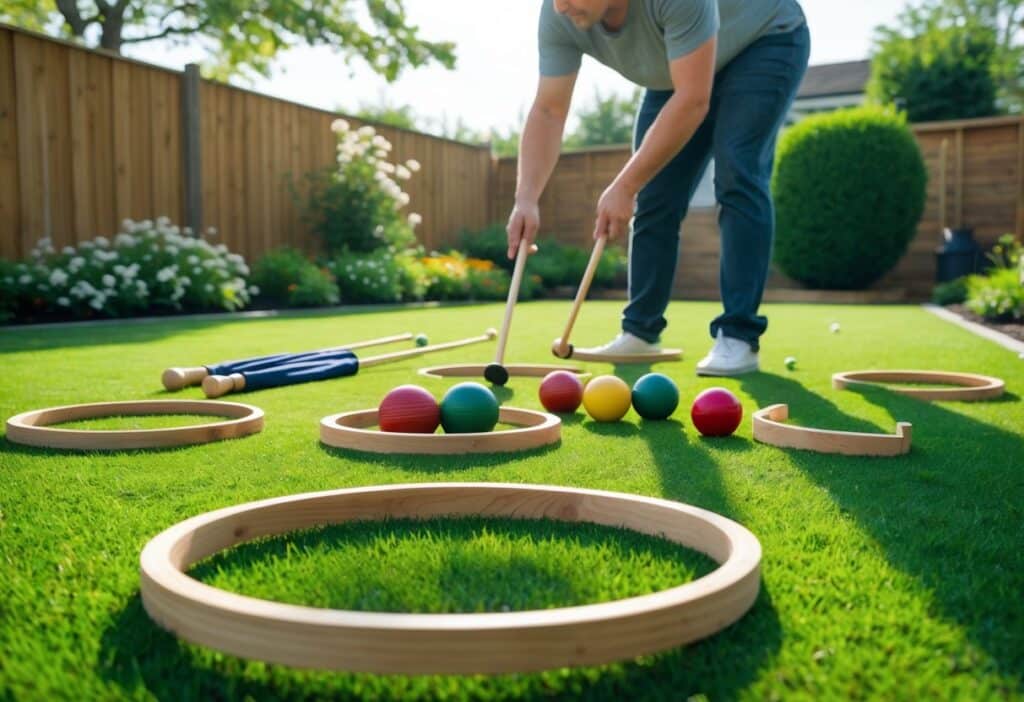
There’s a big difference between a backyard croquet lawn and a genuine croquet court. The equipment is similar. The rules are the same. But the playing experience is entirely different, and that difference comes down to construction quality.
A croquet court built to United States Croquet Association (USCA) standards gives players a surface that’s consistent, predictable, and fast enough to reward shot-making skills over luck. It holds up through a full season, drains properly after rain, and requires manageable ongoing maintenance.
Private clubs across the Southeast that have made the investment in a real professional croquet court find that membership engagement with the sport grows significantly once the facility matches the quality of the game. At Burlingame Country Club in Sapphire Valley, NC, the regulation croquet lawn has become one of the most popular gathering spots on the property, hosting interclub play, tournaments, and casual matches throughout the season.
Getting the construction right from the beginning is the only way to deliver that experience.
Phase 1: Site Selection and Assessment
Every professional croquet court project starts with site selection, and this is where many projects go wrong before the first shovel breaks ground. The ideal land features for croquet courts include a level, well-drained surface that allows for smooth play throughout the year. Additionally, proximity to amenities and adequate spacing from trees can enhance both the experience and maintenance of the courts. Proper orientation towards the sun can also significantly improve conditions for players, making a thoughtful site selection critical to the overall success of the project.
Ideal site characteristics for a professional croquet court include:
The USCA standard for a six-wicket croquet court is 105 feet by 84 feet. You’ll need an unobstructed rectangle of that size plus a clear buffer zone of at least 10 feet on all sides, which brings your total footprint requirement to roughly 125 by 104 feet. Nine-wicket recreational courts are 100 by 50 feet, but if you’re building a croquet court for club or competitive use, plan for the full six-wicket dimensions.
Slope tolerance is critical. A professional croquet court surface should be nearly flat, with no more than a 1% grade in any direction. Anything steeper will cause balls to drift and make the playing surface unfair. The site assessment should include topographic analysis to understand what grading work is needed.
Sun exposure matters for turf health. A site that gets at least six hours of direct sun daily will support the grass varieties best suited for a croquet court. Heavily shaded sites produce soft, weak turf that won’t hold the firm, fast surface croquet requires.
Proximity to trees is something to think through carefully. Mature trees produce root competition, leaf litter, and shade. Root encroachment under a croquet court will disrupt the surface over time and make the turf uneven. If your ideal site has nearby trees, a root barrier installation should be part of the plan.
Soil type is assessed during this phase. Heavy clay soils drain poorly and become slick when wet. Sandy soils drain too freely and struggle to retain moisture during dry periods. Most successful croquet court projects either work with naturally loamy soil or amend what’s there. A soil test, ideally run through a certified agricultural extension lab, will give you the data you need before committing to a site.
Phase 2: Grading and Excavation Requirements
Once the site is selected and assessed, grading is the most critical construction phase for a croquet court. The finished playing surface needs to be smooth and nearly level, which means the ground underneath it needs to be precisely prepared.
Typical excavation for a croquet court removes 6 to 12 inches of existing soil, depending on what’s there. If significant grading is needed to correct the slope, deeper cuts and fills may be required. Any fill material brought in needs to be compacted in layers to prevent settling, which will show up as surface irregularities later.
Precision matters here. A contractor building a croquet court should be using laser-guided grading equipment to achieve the tight tolerances the sport demands. Manual grading is simply not accurate enough for a facility-grade surface.
Key grading benchmarks:
- Maximum slope of 1% in any direction on the playing surface
- No abrupt transitions or “humps” from cut-to-fill boundaries
- Subgrade is properly shaped to support the drainage layer above it
- All soft spots or organic material are removed from the subgrade before any base materials are placed
If your site requires significant cut-and-fill work, this is also the phase where access for heavy equipment needs to be planned. Once the turf is established on a croquet court, you don’t want to be running machinery across it.
Phase 3: Base Layer Preparation and Materials
The base layer of a croquet court is what separates a surface that lasts from one that fails within a few seasons. Most builders and turf managers recommend a two-layer base system: a coarser aggregate layer at the bottom for structural stability and drainage capacity, topped by a finer material that transitions cleanly to the growing medium above it.
Standard base construction for a professional croquet court:
A 4-inch layer of crushed stone (typically 3/4-inch clean crushed limestone or similar) is placed on the compacted subgrade. This layer handles heavy water movement during rain events and provides the load-bearing foundation.
Above that, a 2-inch layer of pea gravel or coarse sand bridges to the growing medium and prevents the finer soil from migrating down into the stone layer over time. A geotextile fabric between the subgrade and crushed stone can help if the subgrade soil is particularly fine-grained.
The entire base system for a croquet court needs to be compacted uniformly. Soft spots in the base will eventually show at the surface. A plate compactor is used across the stone layers to reach the desired density.
Phase 4: Drainage System Installation
Drainage is everything for a professional croquet court. A surface that holds standing water after rain can’t be played on for days, and repeated wet-dry cycles without proper drainage will damage the turf and create uneven spots.
Two drainage approaches are common for a croquet court:
Surface drainage relies on the slight crown or slope of the playing surface to move water off the court naturally. Even a croquet court that’s nearly flat has a very slight contour designed to shed water toward the perimeter.
Subsurface drainage using a perforated pipe installed in the base layer is standard for any croquet court that expects regular play or is located in a region with significant rainfall. Western North Carolina’s mountain climate, with its summer thunderstorms, makes subsurface drainage particularly important for any outdoor sports facility in the region.
A herringbone or parallel lateral drain pattern works well for a professional croquet court. A 4-inch perforated drain pipe is laid in trenches in the base layer, connected to a main collector line that exits to daylight or a dry well. Spacing lateral drains every 12 to 15 feet across the width of the court provides adequate coverage.
All pipe connections should be wrapped with drainage fabric to prevent fine material from clogging the perforations over time.
Phase 5: Soil Composition and Amendment
The growing medium layer on a croquet court is typically 4 to 6 inches of a sand-soil mix placed over the base. This layer needs to support healthy turf while maintaining the firm, fast characteristics that make croquet worth playing.
Ideal growing medium for a croquet court:
A mix of 80% coarse sand and 20% organic matter (compost or peat moss) is commonly used for athletic and specialty turf applications. Pure native topsoil is generally not suitable as the primary growing medium for a croquet court because it tends to compact over time and hold too much moisture, producing the soft playing surface you’re trying to avoid.
Some builders work with the USGA putting green specification as a reference point, adapting the mix for the slightly different maintenance requirements of a professional croquet court surface.
Soil amendment decisions should follow your Phase 1 soil test. If you’re incorporating any existing native soil into the growing medium, knowing its pH (target 6.0 to 7.0), organic matter content, and nutrient profile helps you build a mix that will support turf establishment without ongoing amendment corrections.
Lime applications to raise pH or sulfur to lower it should happen before grass establishment, not after.
Phase 6: Grass Selection, Seeding, and Sodding
The grass surface is what players actually experience on a croquet court, and the right variety makes an enormous difference in playing quality. Different types of turf provide various levels of speed and bounce, which can influence the overall dynamics of the game. Understanding the croquet court surface materials overview helps players choose the best option for their specific needs, ensuring they have an optimal playing experience. Additionally, factors like weather conditions and maintenance routines play a crucial role in preserving the quality of the surface over time.
Best grasses for a professional croquet court:
Bermudagrass is the dominant choice for croquet courts in warm and transitional climates. Varieties like Tifway 419 or Celebration produce a dense, fine-textured surface that can be mown very low (3/8 to 1/2 inch) and recovers quickly from heavy play. At Sapphire Valley’s elevation of around 3,000 feet in the Blue Ridge Mountains, Bermudagrass can struggle through cold winters, so a transitional approach or overseeding with ryegrass for cool-season coverage is common.
Kentucky Bluegrass and Creeping Bentgrass blends are used at higher-elevation croquet court installations where winter hardiness is required. Bentgrass in particular produces the low, tight surface preferred for competitive croquet but demands more intensive mowing and chemical management.
Zoysiagrass offers an excellent middle ground in transitional climates. It handles foot traffic well, produces a dense playing surface, and has better cold tolerance than Bermudagrass in mountain settings.
Sodding vs. seeding: For a croquet court, sodding is strongly preferred. Sod delivers an established root mat that can support limited play within 4 to 8 weeks of installation, while seeded surfaces need a full growing season before they’re ready. The cost difference is significant, but so is the time saved and the uniformity of the finished surface.
Phase 7: Irrigation System Design and Installation
A croquet court without irrigation is dependent on rainfall patterns in a way that most club managers find unacceptable. An underground irrigation system allows you to maintain consistent soil moisture, which keeps the turf healthy and the playing surface predictable.
Irrigation design for a croquet court:
Head spacing should provide head-to-head coverage across the full playing surface. For a standard 105 by 84-foot croquet court, a grid of rotary or pop-up heads on 12-to-15-foot spacing works well. The system should be zoned so the perimeter areas (which tend to dry out faster) can be run separately from the main field.
A smart controller that integrates weather data and adjusts run times based on evapotranspiration is the standard for a professionally managed facility. Overwatering a croquet court is as damaging as underwatering. You want consistent moisture to a depth of 4 to 6 inches, not saturation.
The irrigation installation happens before the growing medium is spread, so the supply lines, valve manifolds, and drain valves are all in place and protected before turf establishment begins.
Phase 8: Perimeter Fencing and Boundary Lines
A professional croquet court needs clearly defined boundaries. The USCA standard uses six-inch white boundary lines to define the playing area, and a four-sided perimeter that marks the legal playing surface.
Fencing considerations for a professional croquet court:
Most clubs install a low-profile perimeter fence or mow a border around the professional croquet court to separate it visually from surrounding turf and create a natural staging area for players awaiting their turn. A 12 to 18-inch mow strip of a contrasting grass or hardscape border gives the court a clean, finished appearance.
Permanent boundary lines on a croquet court can be achieved through painted lines (requiring reapplication), white sand-filled grooves in the turf, or the installation of a fine edging material at the boundary perimeter. For a club facility, painted lines refreshed at the start of each season is the most common approach.
If the croquet court will host formal tournaments, sight lines and spectator area positioning should be part of the perimeter design. A flat spectator surround at grade level allows visitors to follow the play without obstructing the players. Proper lighting specifications for croquet tournaments are essential to ensure visibility during play and to enhance the overall experience for spectators. This includes strategically placed fixtures that illuminate the court without causing glare to players. Additionally, incorporating adjustable lighting options can accommodate varying weather conditions and time of day.
Phase 9: Equipment Installation
With the surface established and boundaries defined, the final step in building a professional croquet court is installing the playing equipment.
Equipment for a USCA-regulation roquet court:
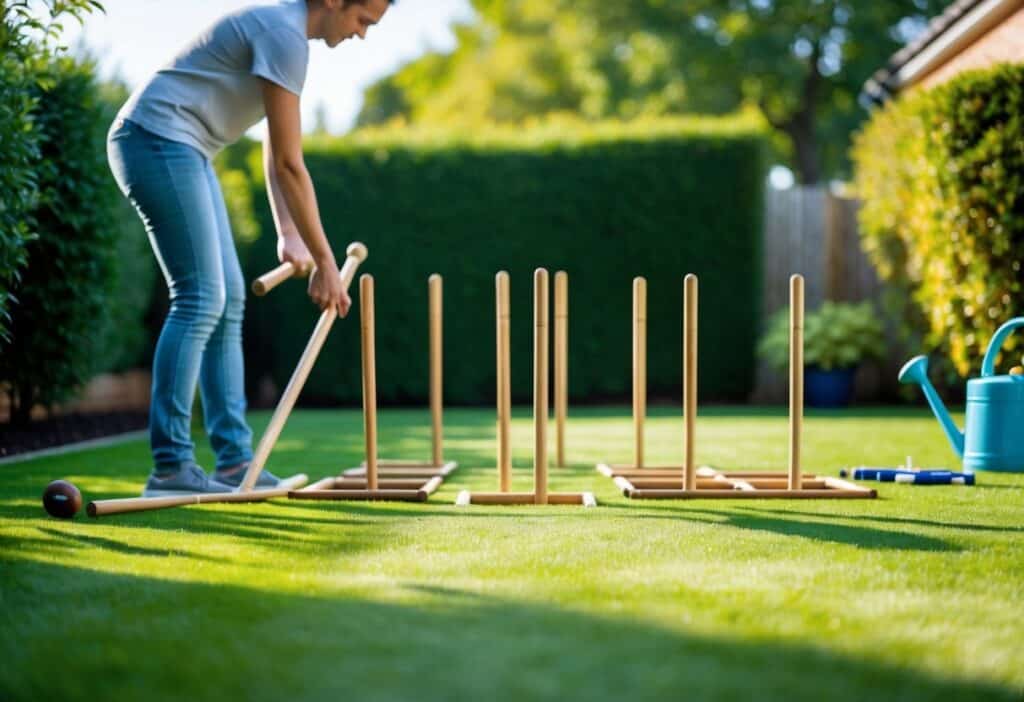
Wickets (hoops): Six-wicket play uses six metal wickets positioned at specific locations defined by the USCA. Wickets should be set to a clearance of 1/16 inch wider than the ball diameter, which demands precise mallet insertion and extraction to set each wicket correctly. Wicket anchors driven deep enough into the turf to resist mallet impact without shifting are important for competitive play.
Center peg: The center peg is the central target in six-wicket croquet. It needs to be firmly anchored and positioned precisely at the geometric center of the croquet court.
Boundary marking pegs: Corner pegs mark the four corners of the court boundary. These are typically 18-inch painted pegs set flush with or just above the turf surface.
Mallets, balls, and clips: While not permanent fixtures of the court itself, a professional croquet court facility should maintain a set of regulation equipment available for members and guests’ use. Ball sets, mallets, and hoops from approved manufacturers like Jaques London or Barlow GT are used at the competitive level.
Phase 10: Timeline from Planning to Playable Surface
Building a croquet court from site selection to opening day typically takes 12 to 18 months when the process is done right. Here’s a realistic breakdown:
Months 1 to 3: Site selection, soil testing, drainage assessment, design development, permitting applications
Months 3 to 5: Site preparation, clearing, rough grading, base layer installation, drainage system installation
Months 5 to 6: Irrigation installation, finish grading, growing medium placement
Months 6 to 9: Turf establishment (sodding immediately, or seeding through a full growing season)
Months 9 to 12: Grow-in maintenance, mowing height establishment, turf hardening
Months 12 to 18: Wicket installation, line painting, soft opening for member play, with continued turf establishment
Rushing any phase of professional croquet court construction creates problems that are expensive to fix after the turf is established. The grading, drainage, and base preparation phases in particular deserve full attention and adequate time.
Contractor Selection for a Croquet Court Project
Not every landscape contractor has experience with the precision required for a croquet court. You’re looking for someone with a specific combination of skills: sports turf management, precision grading, irrigation design, and ideally some familiarity with croquet or similar lawn sports surfaces.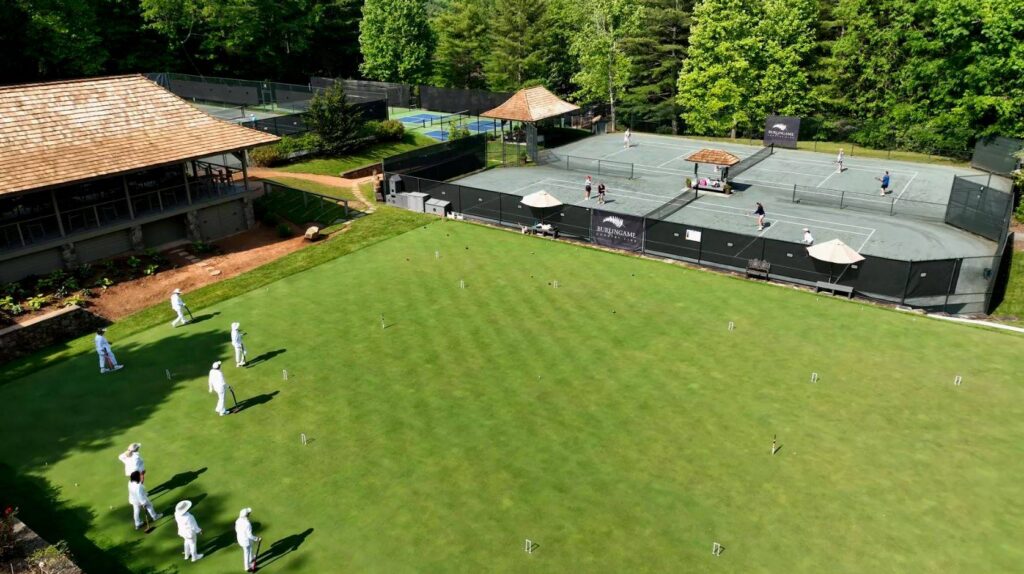
Questions to ask a contractor:
Has the contractor completed other croquet courts, bowling greens, or high-quality putting surfaces? These projects share similar technical demands. Ask for references and, where possible, visit a completed project.
Does the contractor work with a turf management specialist or agronomist? The growing medium mix and turf establishment program for a professional croquet court are not guesswork areas. A qualified turf agronomist should be involved.
What grading equipment does the contractor use, and what tolerances can they guarantee? Laser-guided grading equipment is the expectation for professional-grade surface work.
What is the contractor’s plan for drainage verification? The drainage system should be tested before any growing medium is placed over it.
For clubs considering a broader sports programming investment, the croquet court contractor should coordinate with the general club facilities team to ensure the new facility integrates well with existing turf maintenance programs.
Permitting and Regulatory Requirements
A professional croquet court is typically a low-complexity permit project compared to structures, but requirements vary by county and municipality.
What you may need:
A grading permit is required in most jurisdictions for any land disturbance above a threshold area, often one acre. Since a croquet court footprint is well below that, grading permits are frequently not required, but verify with your local planning department before any ground disturbance.
Stormwater management requirements are increasingly common in areas within mountain watersheds like the Sapphire Valley region of Western North Carolina. Any new impervious surface or significant grading may require a stormwater plan that demonstrates the croquet court drainage system will not increase runoff to adjacent properties.
If the project is part of a larger club facility membership improvement program, check whether a conditional use permit or site plan review is triggered by the overall project scope.
Utility location services should be called before any excavation, regardless of permit requirements. A hit irrigation line, buried cable, or breached drainage system on an adjacent property creates problems that far outweigh the cost of the call.
Cost Breakdown by Construction Phase
Croquet court construction costs vary widely by region, site conditions, and finish level, but a realistic cost framework for a full-specification facility looks like this:
Site preparation and grading: $15,000 to $35,000, depending on the amount of cut-and-fill work required and access conditions
Base layer materials and installation: $8,000 to $15,000
Drainage system (subsurface perforated pipe): $10,000 to $20,000
Irrigation system: $12,000 to $22,000
Growing medium and soil amendment: $6,000 to $12,000
Turf (sod installation for full surface): $8,000 to $18,000
Grow-in maintenance and establishment: $3,000 to $8,000 per growing season
Equipment (wickets, pegs, mallets, balls): $1,500 to $6,000 for a full regulation set
Total project range: $63,000 to $136,000 for a full-specification croquet court
This range reflects a finished, playable facility. Projects at the lower end typically involve favorable site conditions with minimal grading required. Projects at the higher end involve significant site work, subsurface drainage complexity, or premium turf specification.
Annual maintenance for a croquet court, including mowing, fertilization, irrigation management, pest control, and equipment upkeep, typically runs $8,000 to $20,000 per year, depending on how intensively the surface is managed.
Common Construction Mistakes to Avoid
The most common croquet court construction failures are predictable, and most of them trace back to shortcuts taken during the early phases.
Inadequate drainage design is the most frequent problem. A croquet court that holds water after rain cannot deliver the firm, fast surface the game requires. Never economize on drainage.
Insufficient base depth leads to surface settling and soft spots. The base layer needs to be deep enough to support the turf and equipment above it. Shaving an inch or two off the specified depth to save on materials creates uneven surfaces within a few seasons.
Skipping the soil test is a common mistake that leads to ongoing turf management problems. If the growing medium pH, nutrient levels, or composition are wrong, establishment will be slow, and the turf will be weak.
Incorrect grass variety selection is particularly important in mountain settings like Western North Carolina. A warm-season grass that isn’t cold-hardy enough for the elevation will thin out over winter and require costly renovation.
Rushing turf establishment is perhaps the most common pressure point. The first year of a croquet court surface is turf establishment time, not competitive play time. Opening a court to heavy play before the turf root system is fully established compacts the growing medium, damages the young turf, and compromises the long-term quality of the surface.
Step-by-Step Visual Guide
A successful croquet court project follows this sequence clearly:
Step 1: Site survey and topographic mapping, soil sampling, drainage assessment
Step 2: Design finalization, including court dimensions, drainage layout, irrigation zones, and equipment locations
Step 3: Site clearing, rough grading, subgrade preparation
Step 4: Drainage system trench excavation, pipe installation, and stone backfill
Step 5: Irrigation main lines, lateral lines, valve box installation, and controller rough-in
Step 6: Base layer crushed stone placement and compaction
Step 7: Growing medium spread to design depth, finish grading to final tolerances
Step 8: Irrigation head installation and system testing
Step 9: Sod installation or seeding program initiation
Step 10: Establishment maintenance period (mowing, irrigation management, pest monitoring)
Step 11: Boundary line painting, wicket and peg installation, equipment staging
Step 12: Soft opening, player orientation, and ongoing surface monitoring
See a Professional Croquet Court in Action
Before breaking ground on your own project, there’s real value in spending time on a finished, well-maintained croquet court to understand what the game demands from the surface. Watching competitive play and talking with players about what they notice reveals details no construction guide can fully capture.
Burlingame Country Club in Sapphire Valley, Western North Carolina, maintains a USCA-regulation croquet court as part of its lawn sports program, led by Tom Tyler, a multi-certified Lawn Sports Professional. The program includes interclub play, lessons, and tournaments, and the facility represents what a well-built and well-maintained croquet court looks like after years of careful upkeep.
If you’re evaluating membership and curious about the croquet program alongside everything else the club offers, reach out to Jennifer Webb, Membership Director, at 828.966.9200.
Frequently Asked Questions
How long does it take to build a croquet court?
From site selection to an opening-ready surface, building a croquet court typically takes 12 to 18 months. Most of that time is turf establishment, not construction. The physical construction phases (grading, drainage, irrigation, base layers, and sod) can be completed in 8 to 12 weeks under good weather conditions.
How much does a croquet court cost to build?
A full-specification professional croquet court typically costs between $63,000 and $136,000, depending on site conditions, regional labor costs, and finish level. Annual maintenance runs $8,000 to $20,000. Site conditions are the biggest cost variable; a flat, well-drained site with good soil will come in significantly lower than a site requiring major grading and drainage work.
What maintenance does a croquet court require?
A croquet court needs regular mowing (typically twice per week during the growing season), irrigation management, fertilization, pest control, seasonal aeration, topdressing with sand to maintain surface firmness, and periodic renovation of turf wear areas. The annual budget for croquet court maintenance at a club facility typically runs $8,000 to $20,000.
Building It Right the First Time
A croquet court is a long-term investment in a sport that rewards the quality of the surface. The players who use it will notice every bump, every soft spot, and every drainage issue. The ones who never notice anything are playing on a court that was built correctly.
Every phase of professional croquet court construction, from site selection through turf establishment, depends on the accuracy of the work done before it. A precise subgrade supports a functional drainage system. A functional drainage system supports healthy turf. Healthy turf produces the firm, fast playing surface that makes the game worth playing.
Whether you’re building a professional croquet court for a private estate, a residential community, or a full club facility, the investment in quality at each phase is what delivers a surface that lasts and plays well for decades.